An in depth look at the workings of a screenpack. By MrSteve81.
Hey you there! You with the face. Yes you! Ever seen a screenpack and thought "That's one mighty fine looking screenpack. I wish I could make 1". Well guess what?
With a copy of photoshop (other image software is available), Fighter Factory and notepad this could one day be a reality.
This tutorial is going to explain how to make each section of your screenpack, from the title screen to the versus screen and everything in between.
I'm going to release it in sections due to the fact that I really cant be arsed to type so much in one go. I'm also going to be creating a (probably) quite basic screenpack at the same so you can see an example of how it can look. I believe a few pictures makes things easier to take in as well.
So without further ado lets get on with the show!
PART 1: Title Screen
I'm starting with the first thing you will see when you start up mugen; the title screen.
The first thing I would suggest is to download a fresh copy of mugen. No one wants to mess up their main mugen should something bad happens. You can get a fresh mugen from here:
http://randomselect.piiym-net.com/Check the sidebar for downloads. As this is 2008 and I don't have a completely rubbish computer I'm going to download windows mugen plus. This gives me the option to use either high or low res stages. Which is much better than having to choose! For this part of the tutorial it doesn't matter which version you choose. As long as it says win mugen you are on to a winner.
Also while online you should get a copy of Fighter Factory if you don't already have it.
http://virtualltek.mgbr.net/This doesn't have to be an unused copy.
Now the fun stuff starts - changing things!
Open Fighter Factory (From now on FF) and click sprites on the top bar:
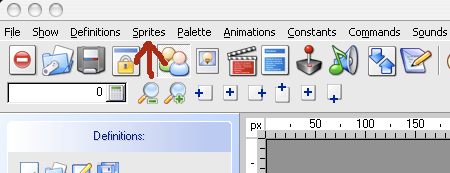
Then click on open. Find your new mugen folder and then the data folder inside that. In the data folder select system.sff. System.sff is the sprite file for your entire screenpack apart from the lifebars. I've covered lifebars in a previous tutorial so I'm not going over it again now.
Have a look at the sprites that are in the default screenpack. Recognize them I hope!
I've decided that I don't want mugen written in big letters on my screenpack. My personal screenpack is going to be a Street Fighter/ Marvel type thing. Yeah its been done before but I don't care. I might not release it if you're going to be rude about it before you've seen it.

.
Obviously the first sprite in the default screenpack is this:

Its got to go.
Make a new logo in photoshop or whatever you're using. Maximum size you can use is 240 pixels high x 320 pixels wide if it is a static image. Convert it to indexed colour as this will bring it down to the 256 colour maximum you are allowed in mugen. Save it as a .pcx. Mine looks like this:

I know its simple but I plan to have some animation as well. Should look quite nice when I'm done. If I can get my idea working anyway!
Lets get our sexy little bootys back to FF. Click the palette icon up near the top. It brings up a box that looks like this:
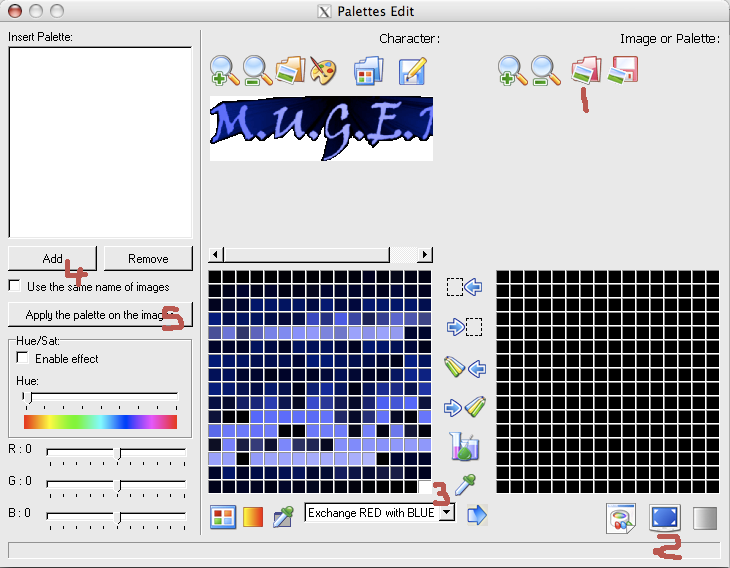
I added the numbers myself. Thats because they are very important for you.
Press the buttons in the correct order for it to work properly.
1. Open the image you just created
2. This puts all the colours in more of an order. Useful if you wish to make different versions in other colours quickly. You can play with this yourself but its not important if you are happy with your colours.
3. Make sure the colour in this box is the colour you want for your transparent colour. Then select all the other colours using a shift click. Click on the arrow pointing left towards the box (Sorry should have been a number there) and then click the arrow pointing left towards the colouring pencils slightly further down. This transfers all your colours across.
4. Click add and find your sprite you created.
5. Click this box and then shut this box.
Find the sprite with the mugen logo and in the box to the left select change sprite. Change it for your sprite and then go back to the sprite dropdown menu and hit save.
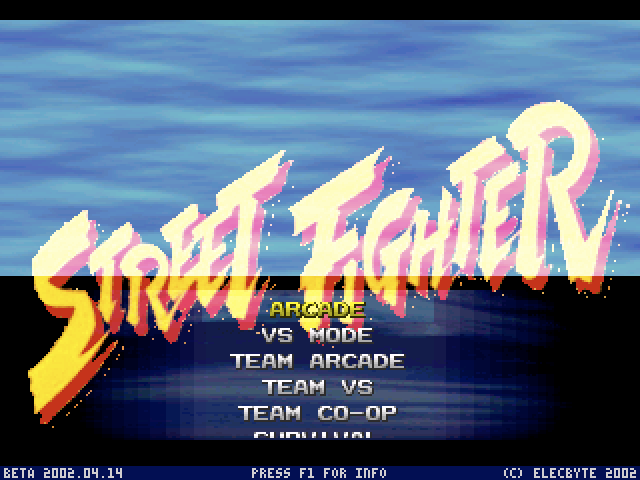
Guess what? We are ready to test it out. Start mugen. Do it now!
I don't know about you but mine looks pretty cool. Needs a bit of work realigning it but its not a bad start I don't think.
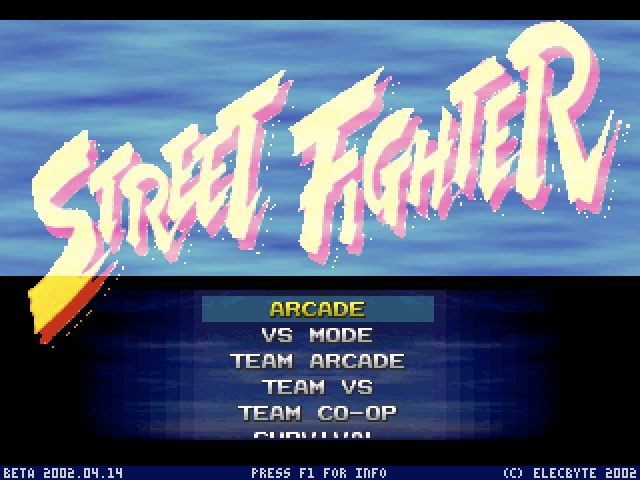
There are 2 ways to move the new image. You can either move it in FF or in the coding in the data folder. I'm going to do it in FF because thats my way of doing it, and I want to avoid going into coding in this lesson.
All I have to do is move the sprite up a bit and then save again. I've decided to leave it here as I have plans for other things.
That's it for part 1. Until part 2 comes along why not try experimenting with other parts of the sprite file. You could even try having a look in the system.def to see if you can make sense of any of that.
Don't worry if you cant because I'm going to cover that in next weeks lesson.
I hope after reading this you can see that mugen creation isn't difficult. I know there are a lot of words in this tutorial but I've tried to make it as simple as I can for everyone to be able to understand.
Special Note: This goes out to all the multi forumer's - I have no problem with this tutorial or any others I make being made available anywhere but just leave my name on it. Thanks.


 April Fools